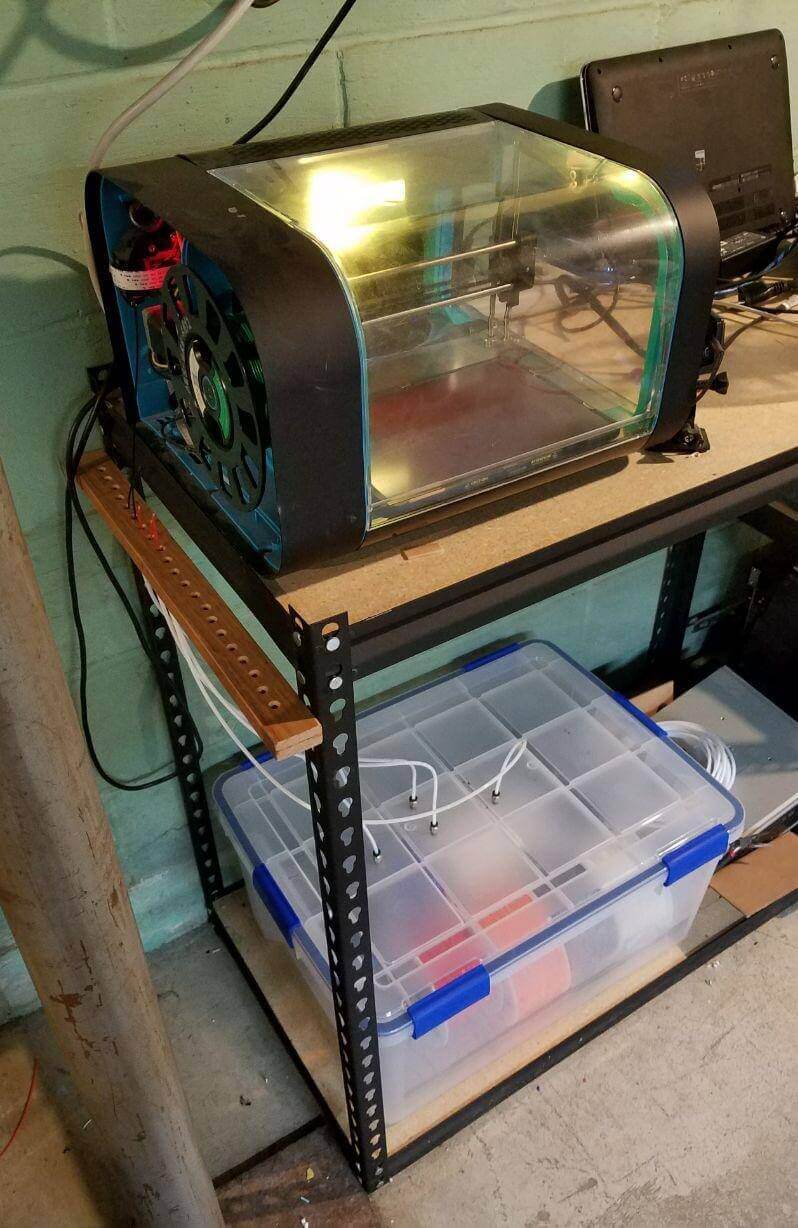
Keep your filament dry! Filament used for 3d printers will absorb moisture from the air and damp filament prints very poorly. With Buffalo’s high humidity and our printer being run in a basement, we absolutely need a dry box for our spools. We ordered parts ahead of time, slammed this box together in an afternoon, and then baked our spools to rid them of moisture.
We’re using a large plastic bin for storage, teflon tubing to run from the box to the printer, and pneumatic connectors to ensure the filament feeds smoothly into the tubing without snagging. A large pack of silica gel keeps the box dry over time. Our basement also has an additional air dehumidifier that we keep at 50% to prevent mold growing on our wood/mdf surfaces.
Supplies:
- Sterilite Air Tight Bin, fits about 8-10 reels. (Amazon)
- 5-10 Meters of PTFE Teflon Tube OD 4mm ID 2mm (Amazon)
- M5 Lock Nuts, 1 per reel (Amazon)
- 5mm Male Thread 4mm Push in Joint Pneumatic Connector, 2x per reel (Amazon)
- Scrap Wood Strip
- 608ZZ Bearings, 4x per reel (Amazon)
- DRY&DRY Silica Gel Desiccant Packet, Rechargeable (Amazon)
Tools:
- Power Drill
- 5mm or 3/16" Drill Bit
- 1/4" Drill bit or larger
- Sander/Sandpaper (optional)
- Rubber Mallet, Optional but makes it easier to fit bearings
- Oven
3D Prints
- Filament Spool Roller - https://www.thingiverse.com/thing:2185015
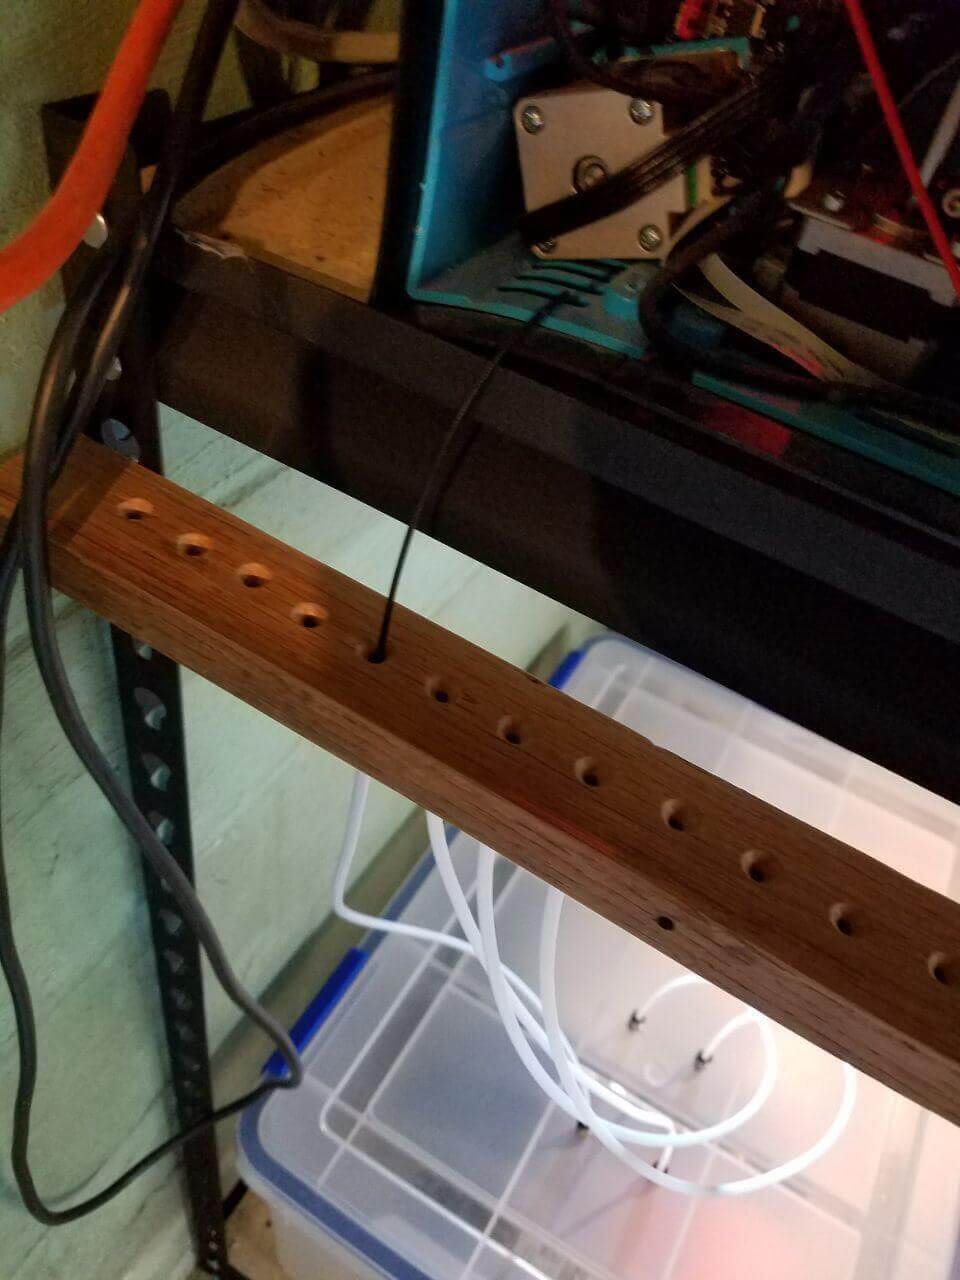
Preparing the Feed Strip:
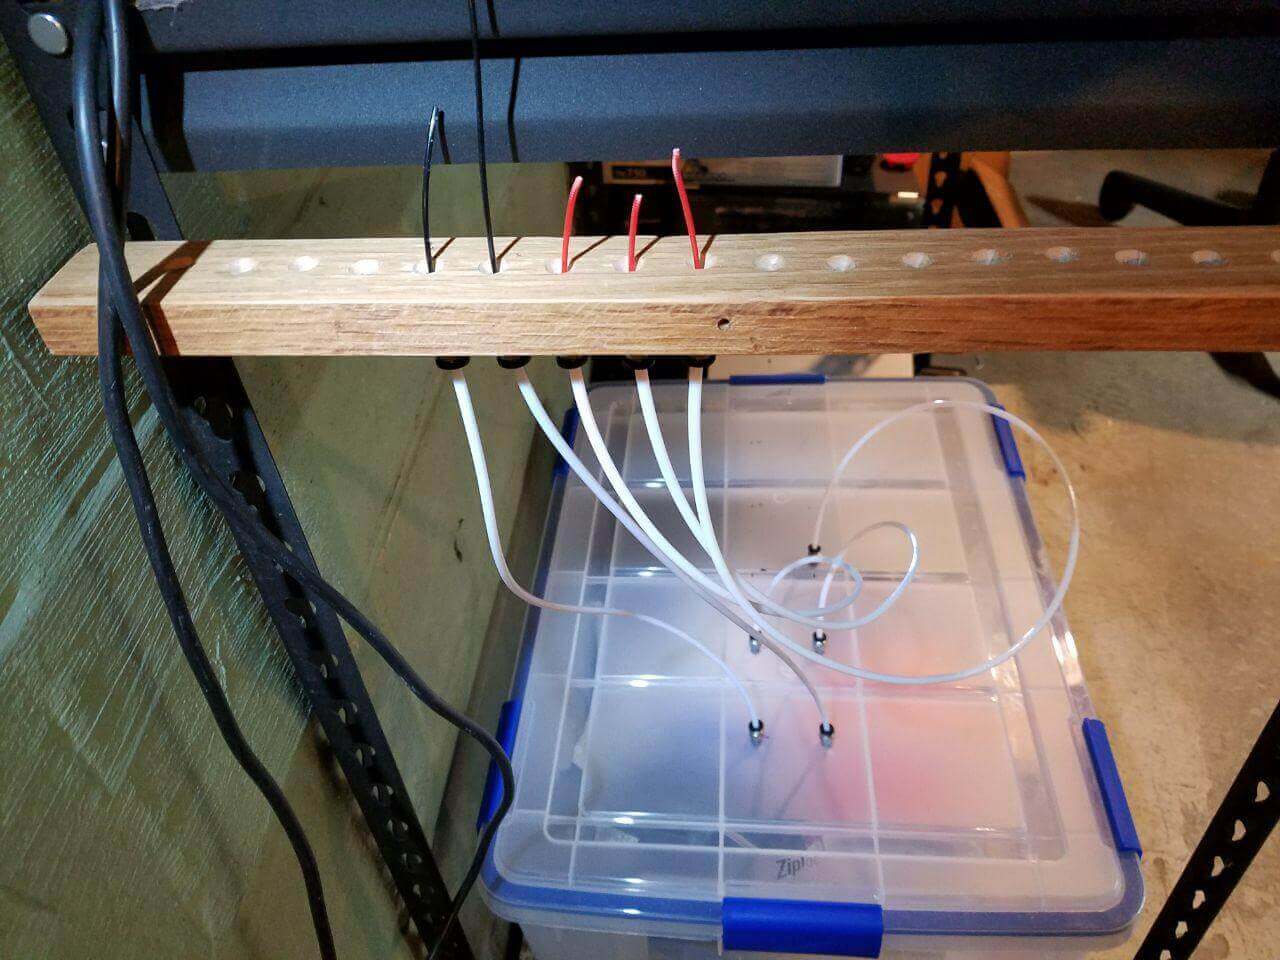
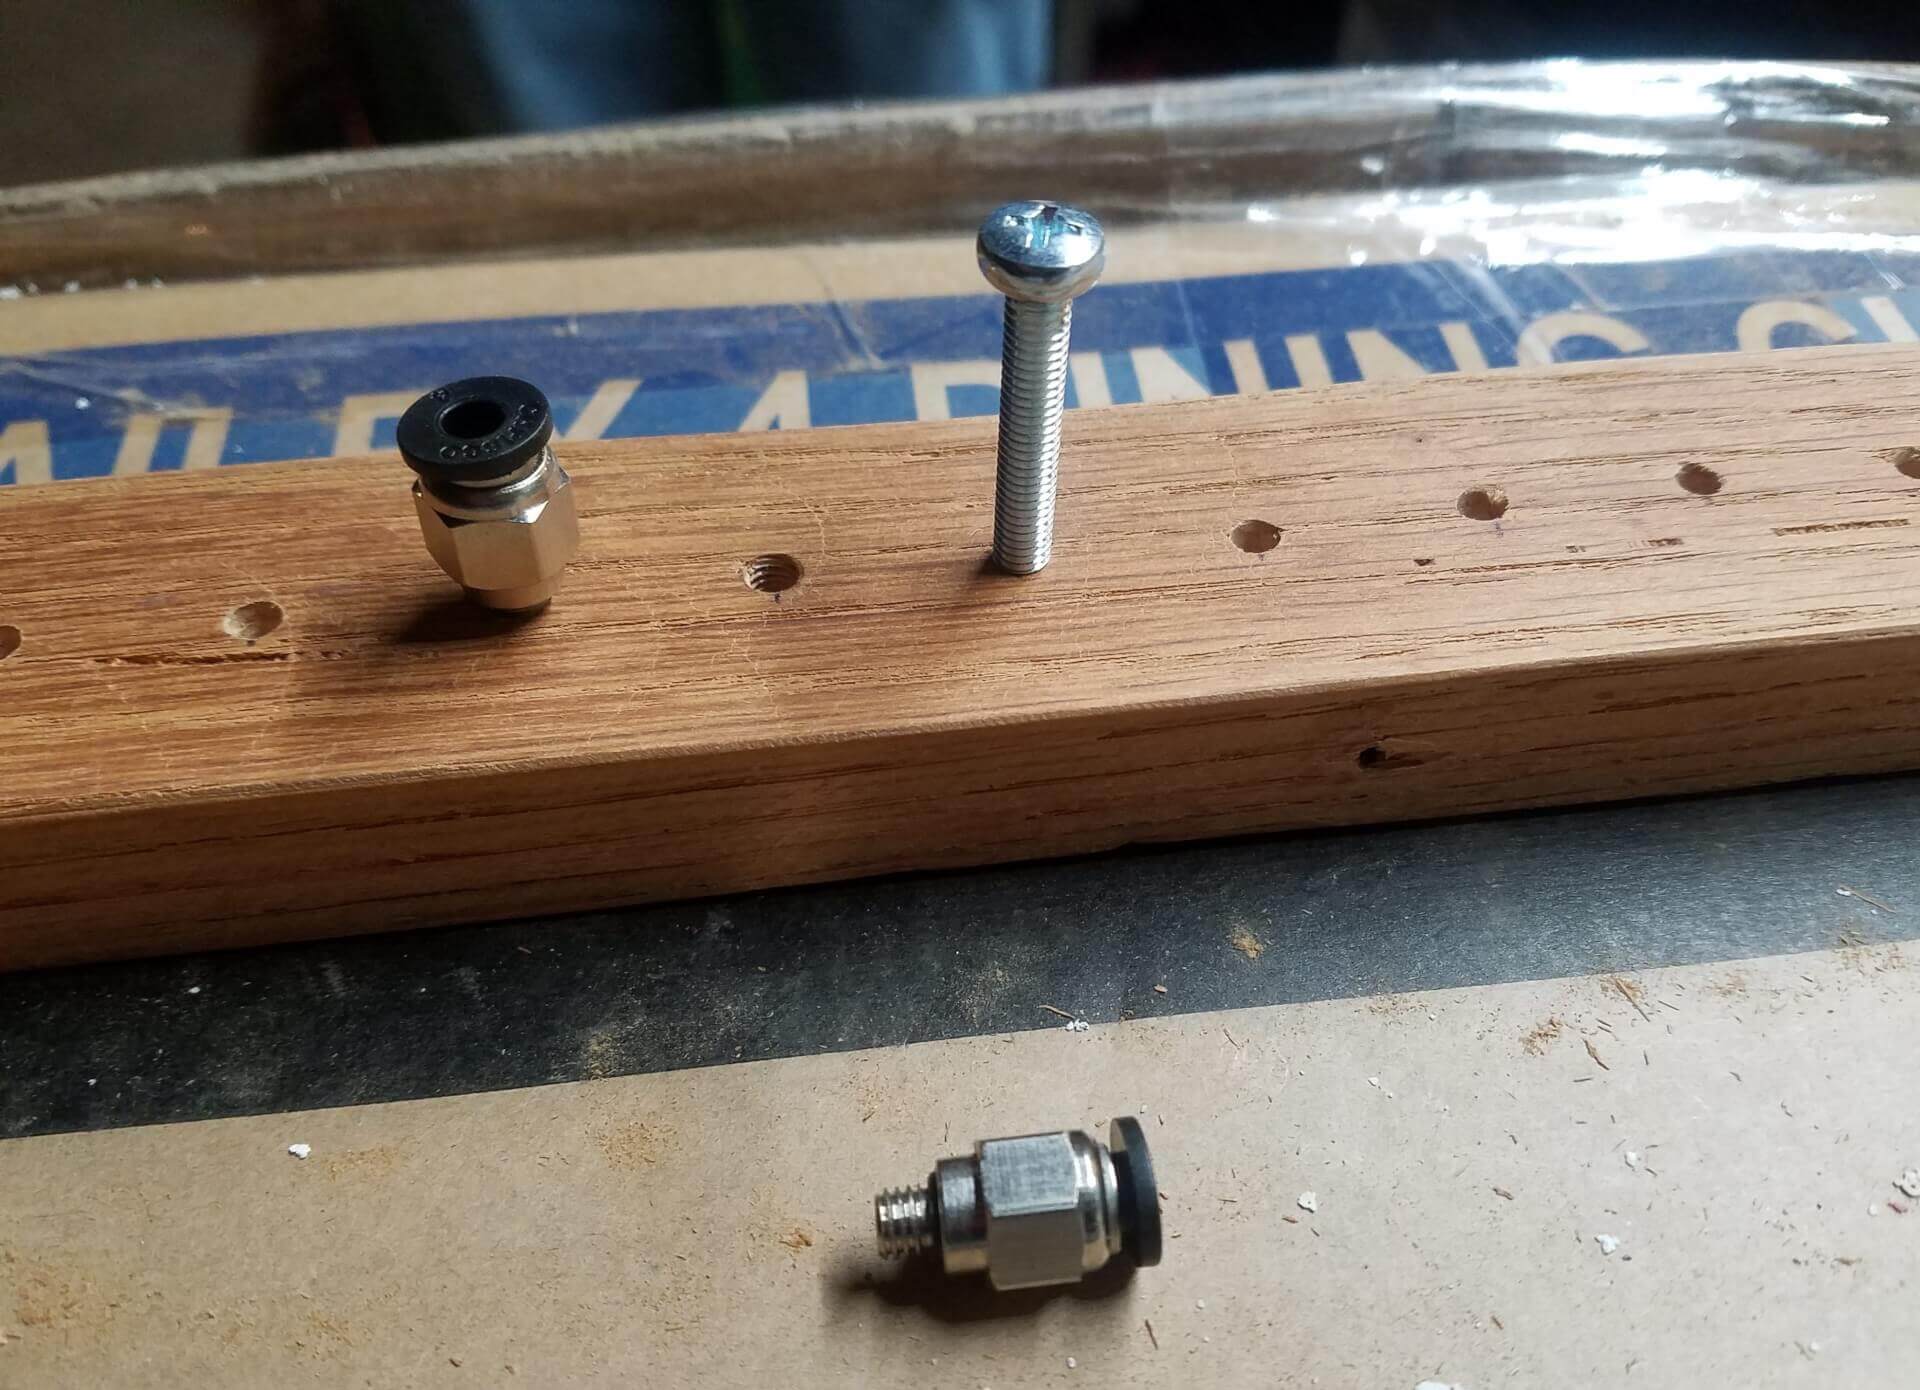
This strip is where the filament goes from dry air to the printer. Drill holes (3/16" Drill Bit) about 2cm apart on a strip of wood. I drilled as many as I could to future proof my design.
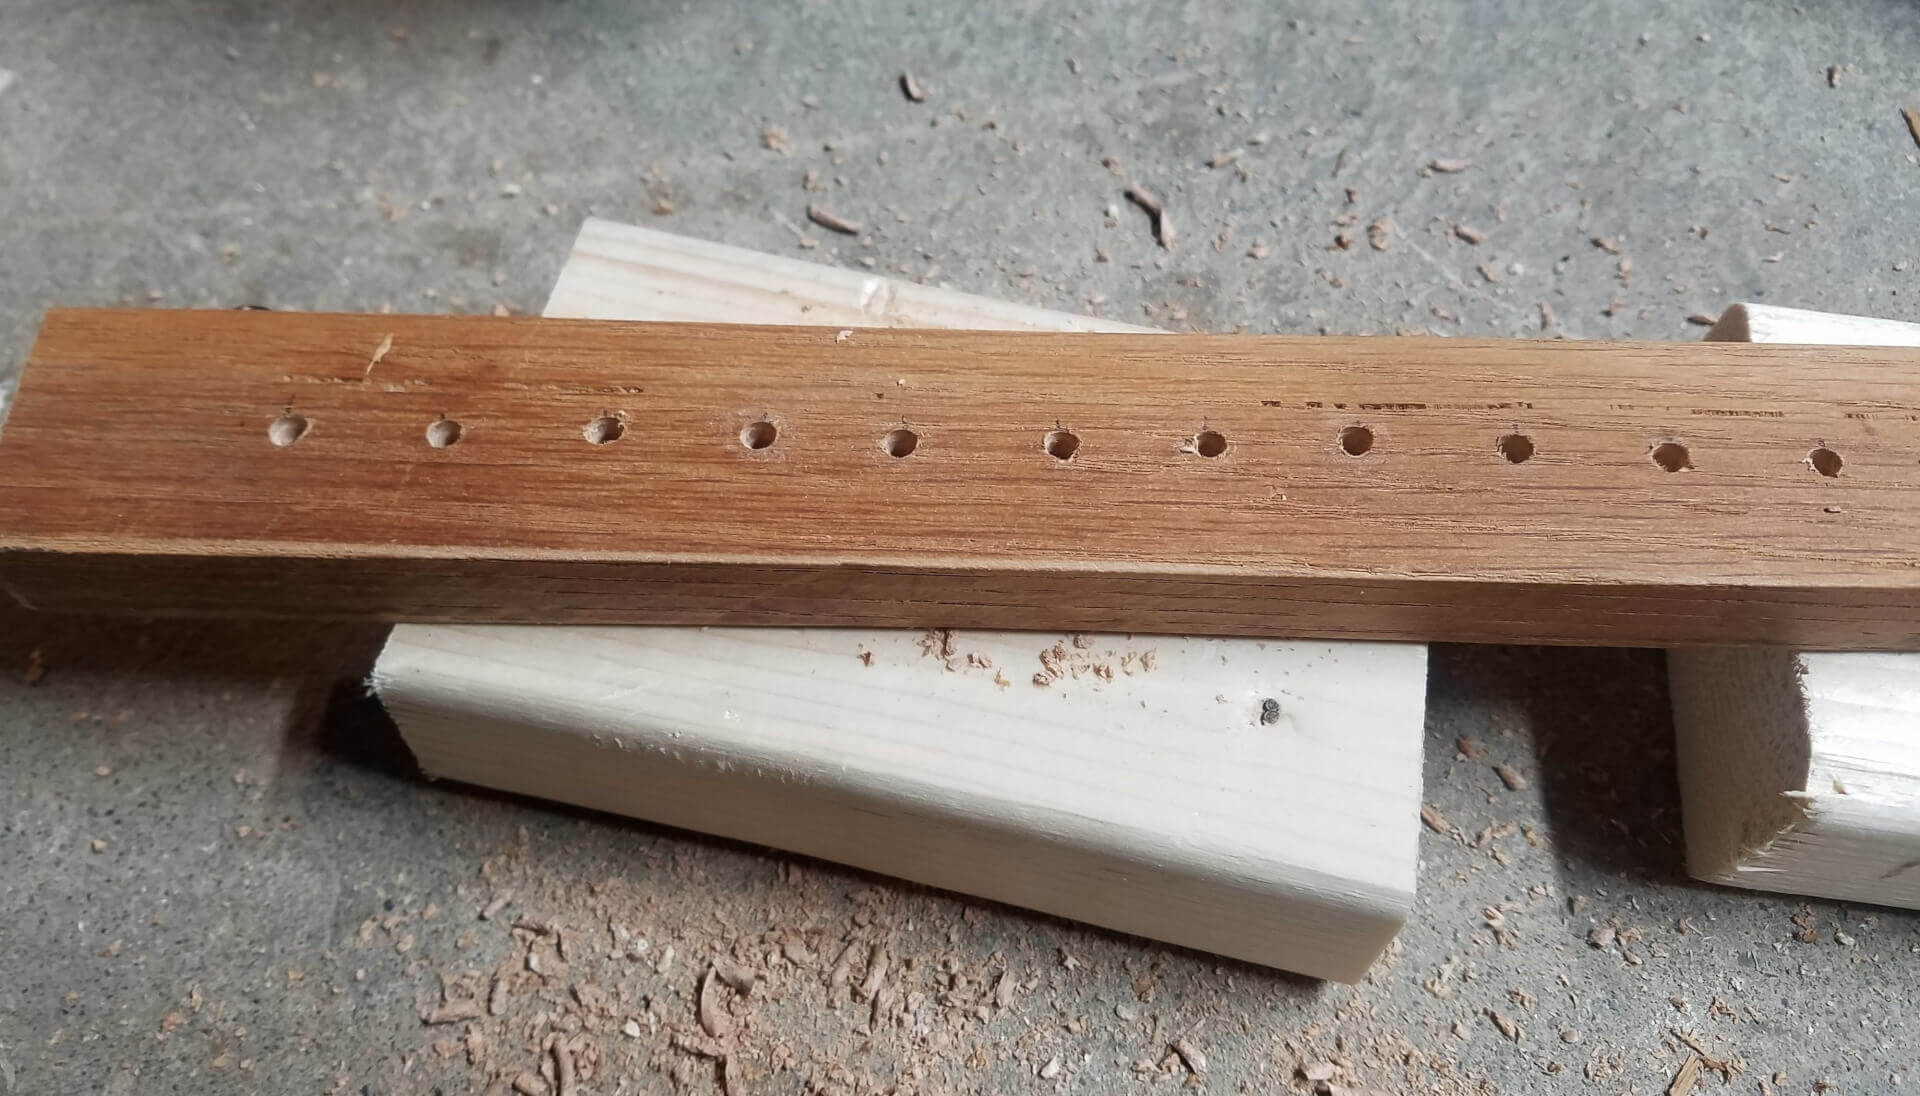
Bevel the holes to clean up the edge and give the filament room to wiggle (1/4" Drill Bit).

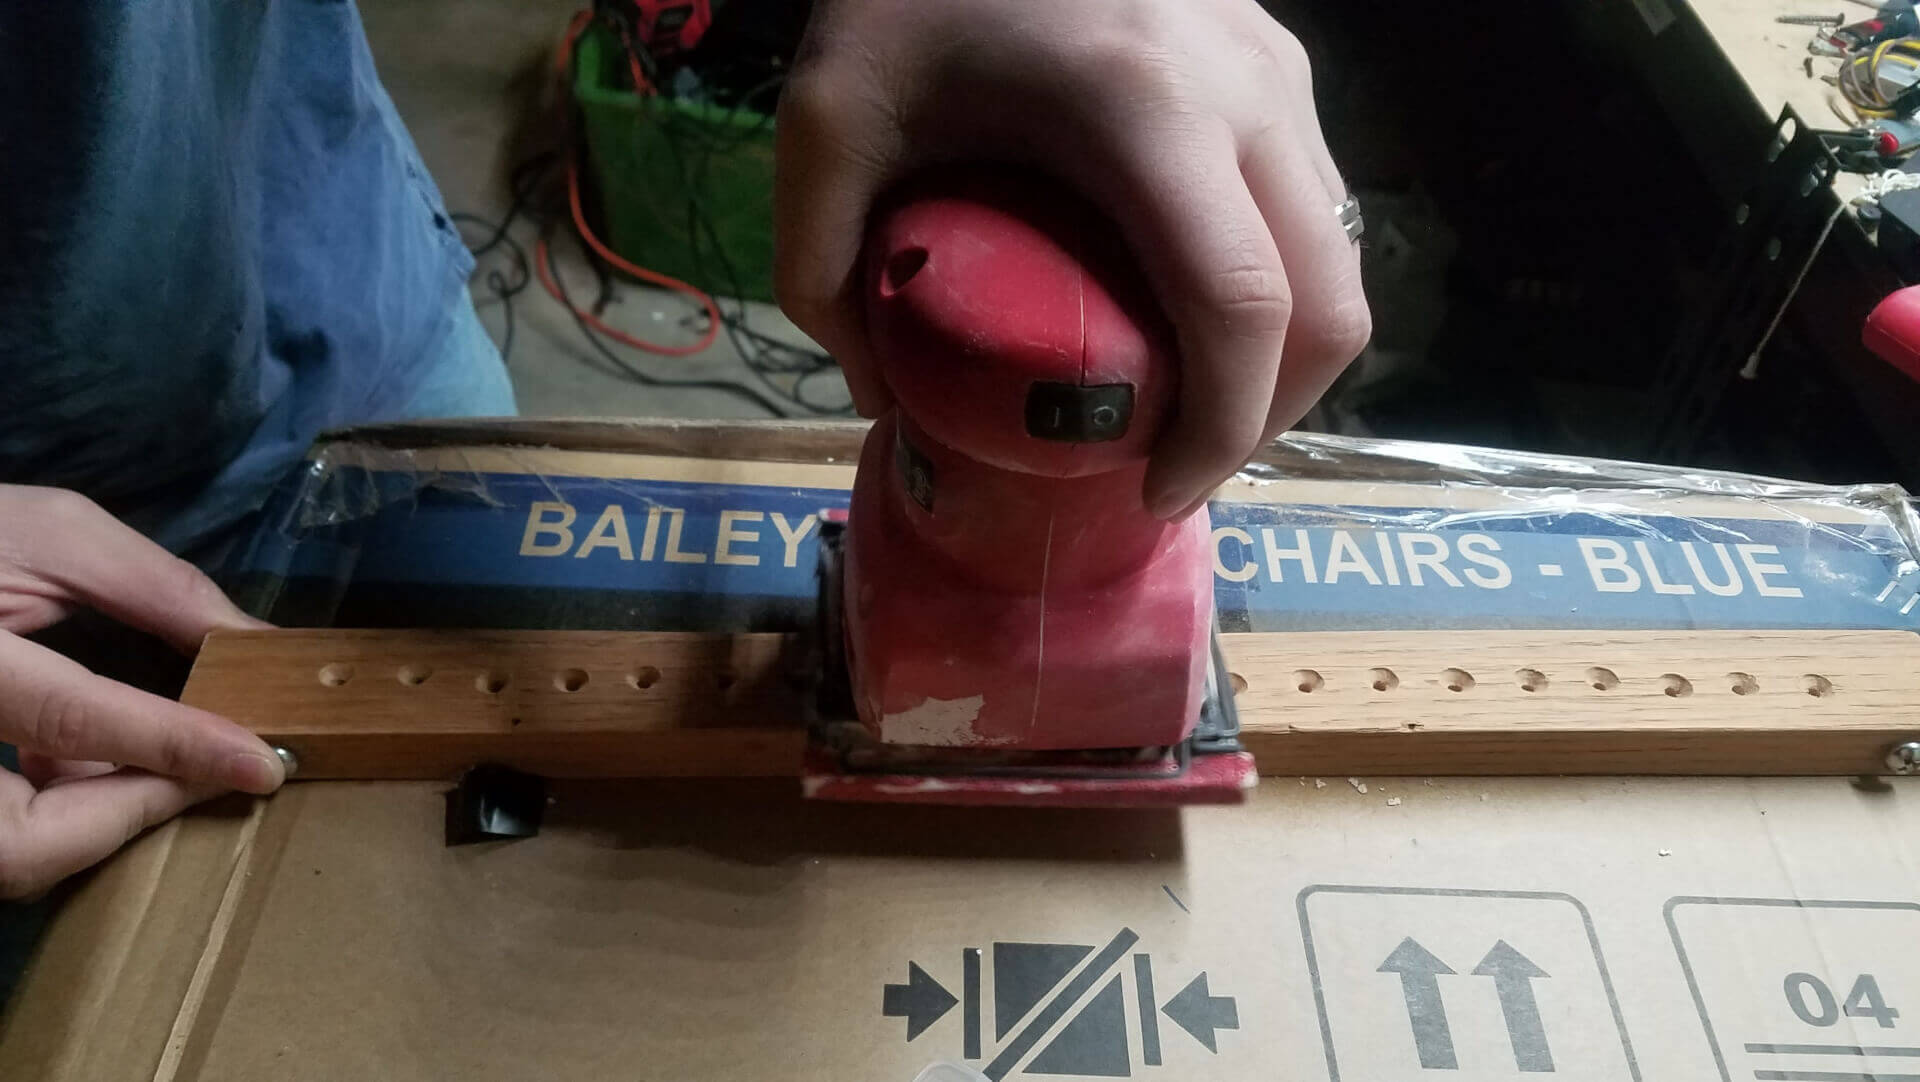
Sand to prevent splinters and clean up drill shavings.
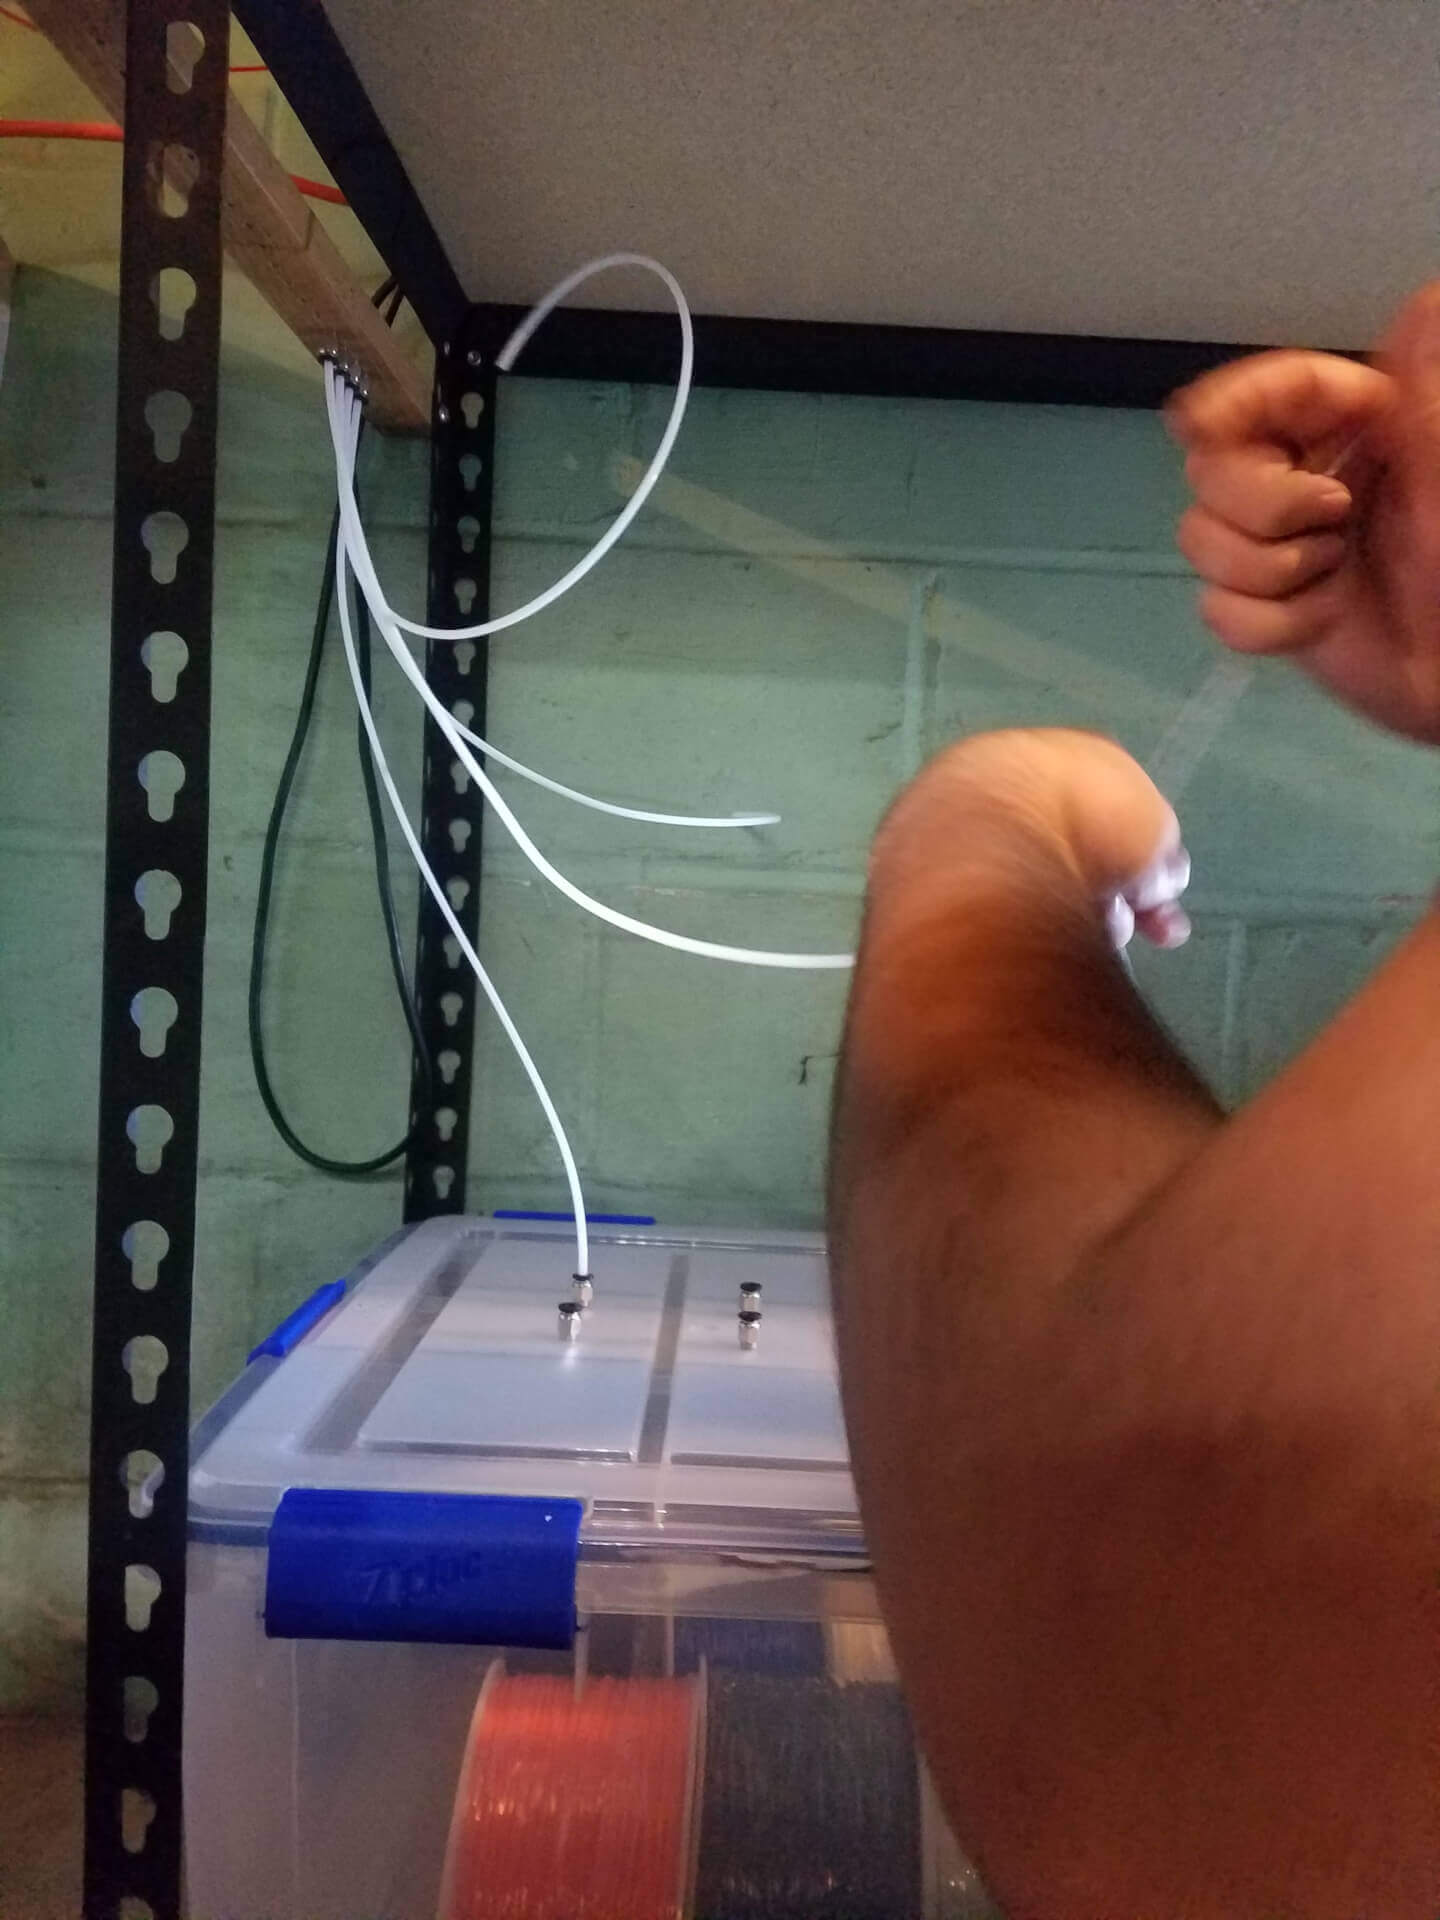
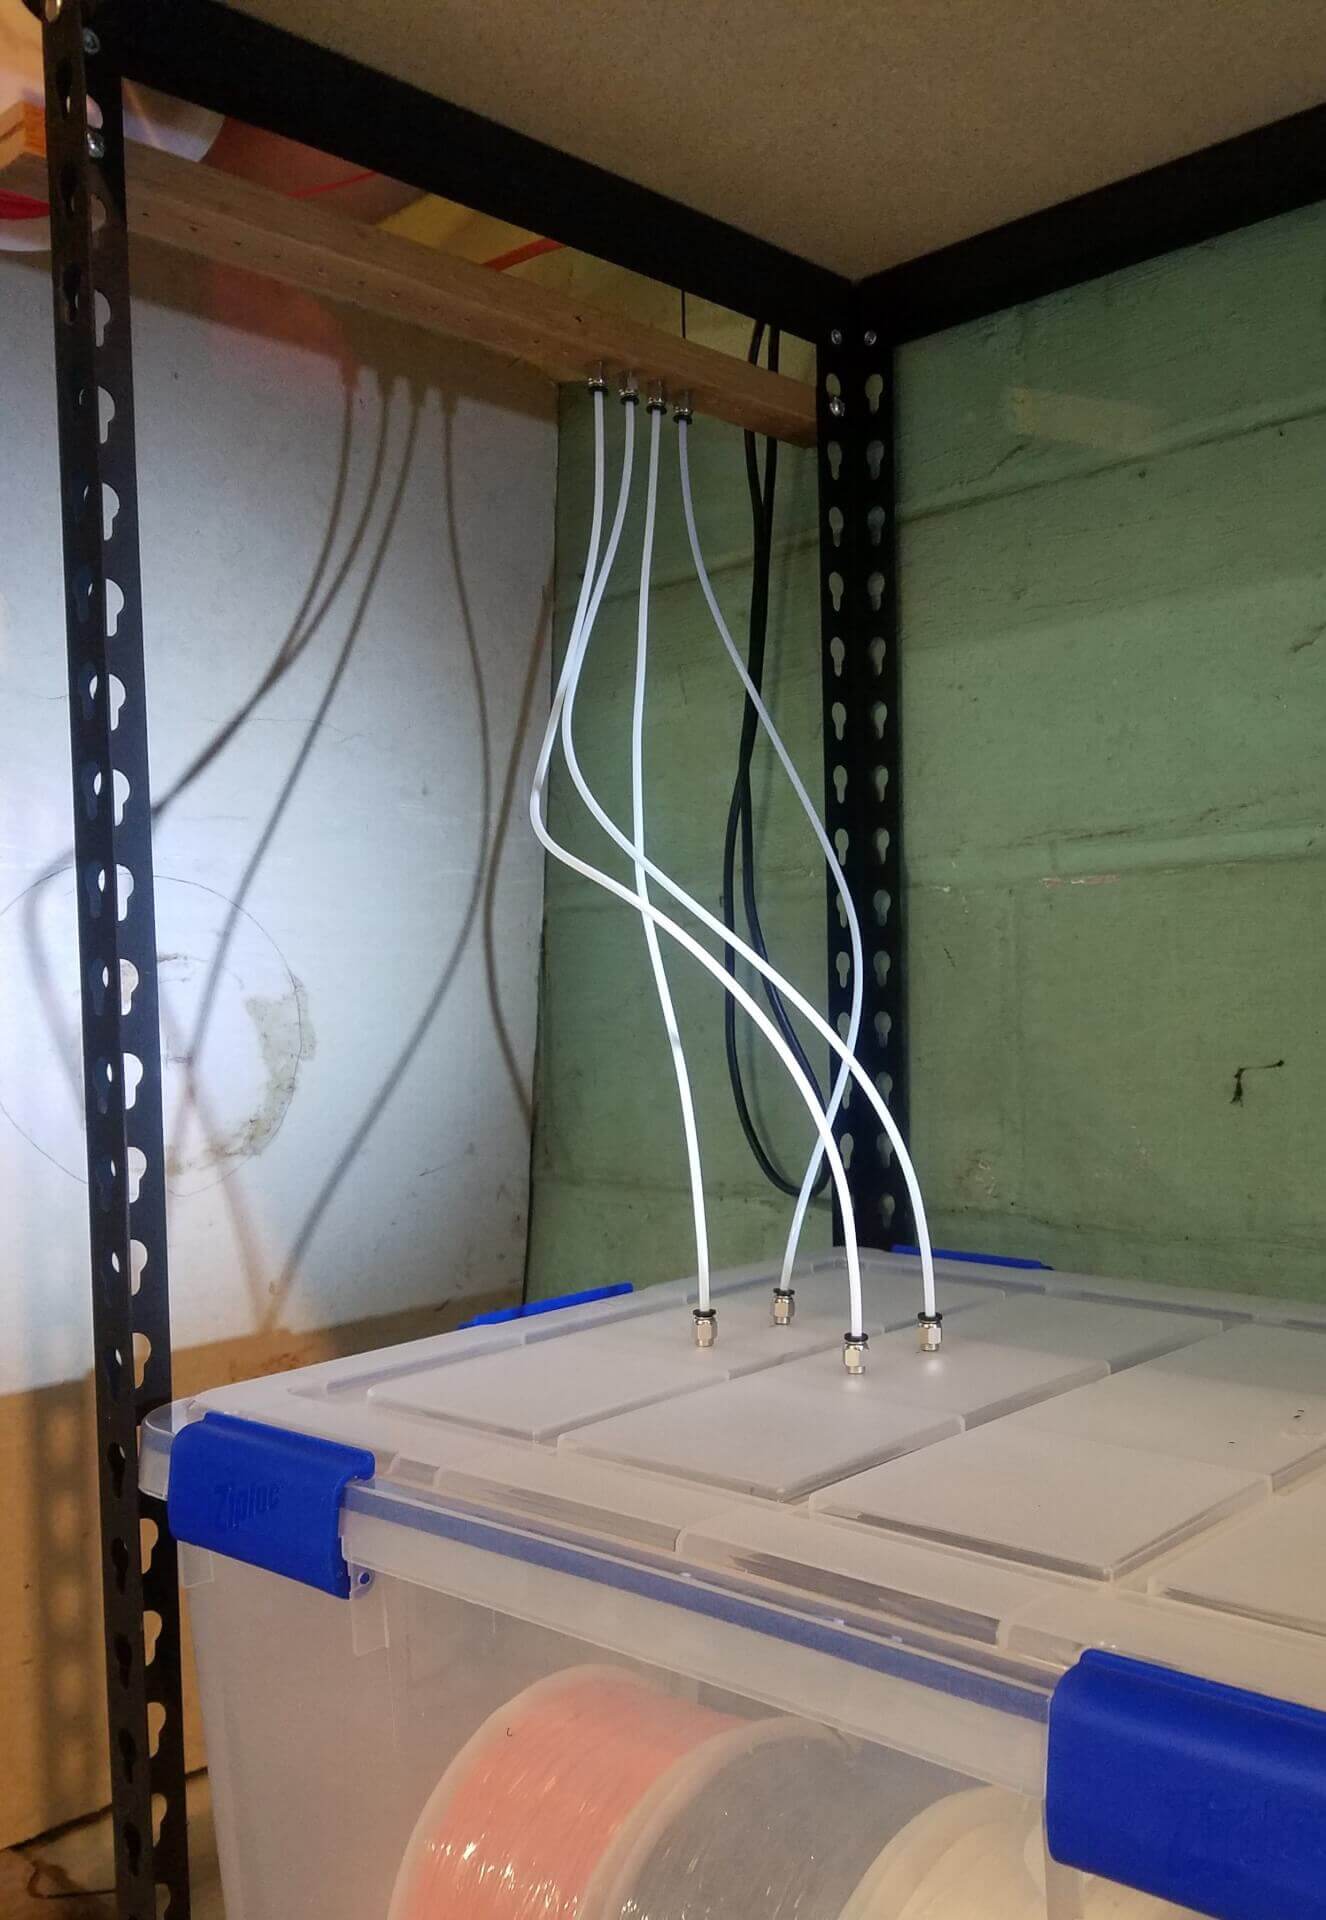
Screw in the pneumatic connectors to the bottom of the wood strip. Threading the holes with an M5 bolt made this much easier. If you’re fancy you could make a real tap from a threaded rod or bolt but we don’t have time for that.
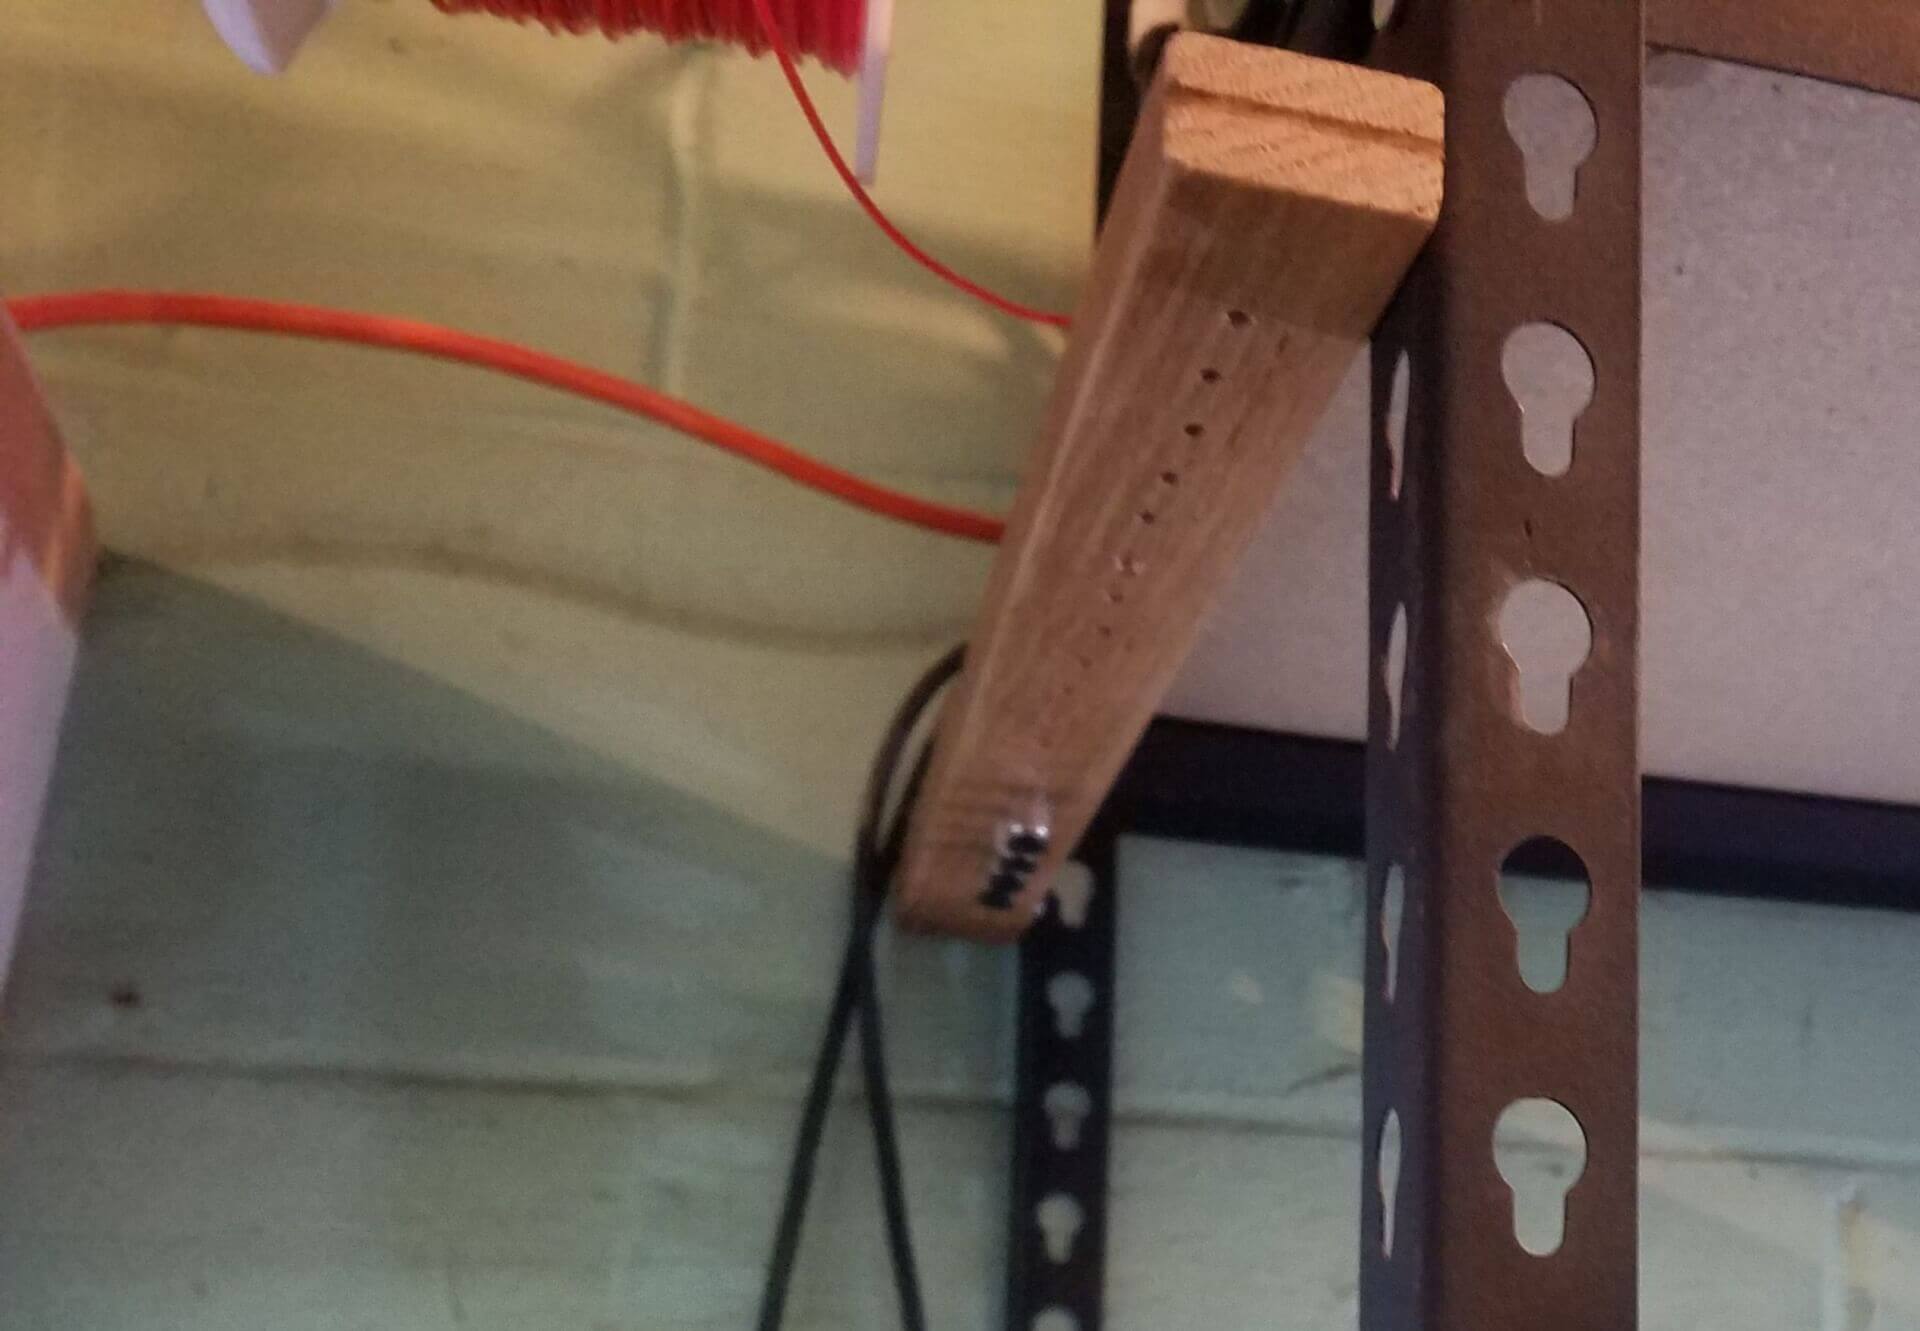
We mount it on our shelving with some more M5 bolts. It locks in just like the shelves.

Preparing the Bin:
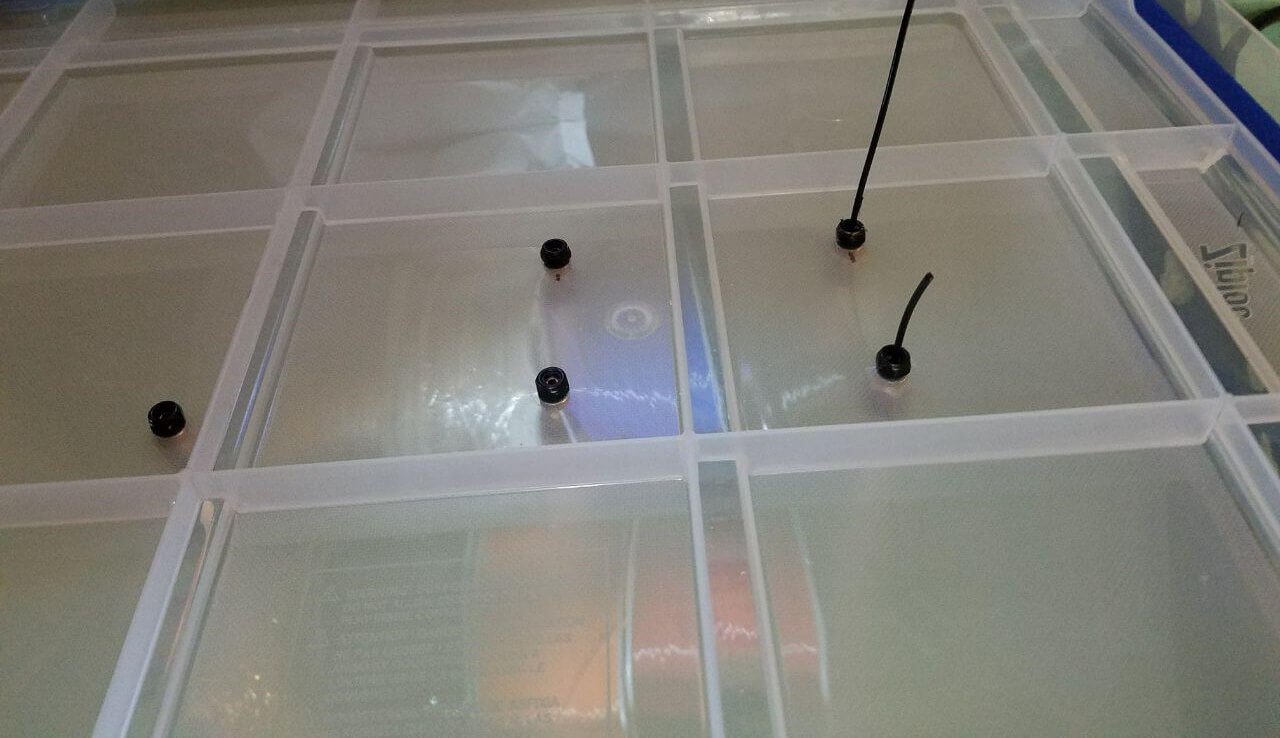
Drill holes (3/16" Drill Bit) through the bin lid. Clean off any plastic shavings that may be left. Our bin holds 8-10 spools depends on their width.
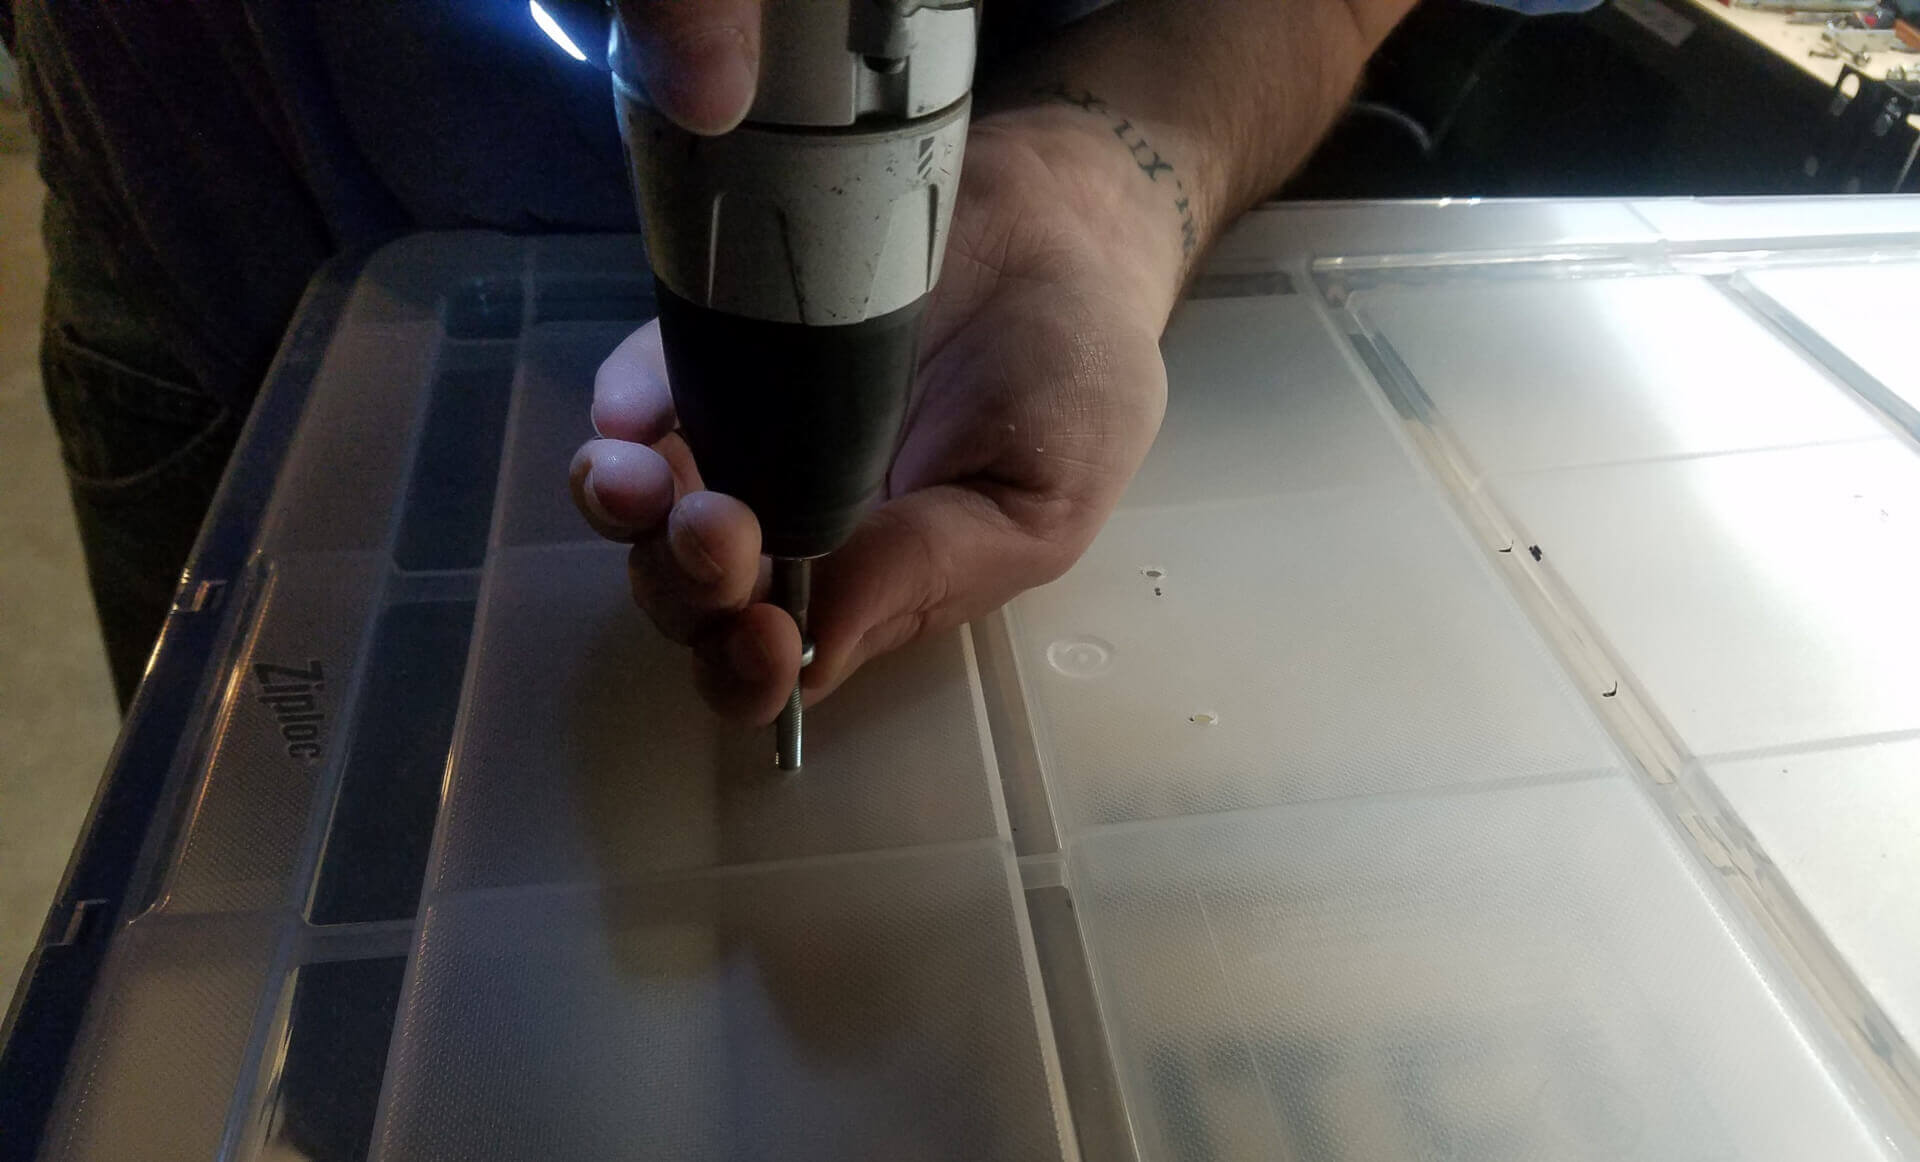
Screw in the pneumatic connectors from the top.
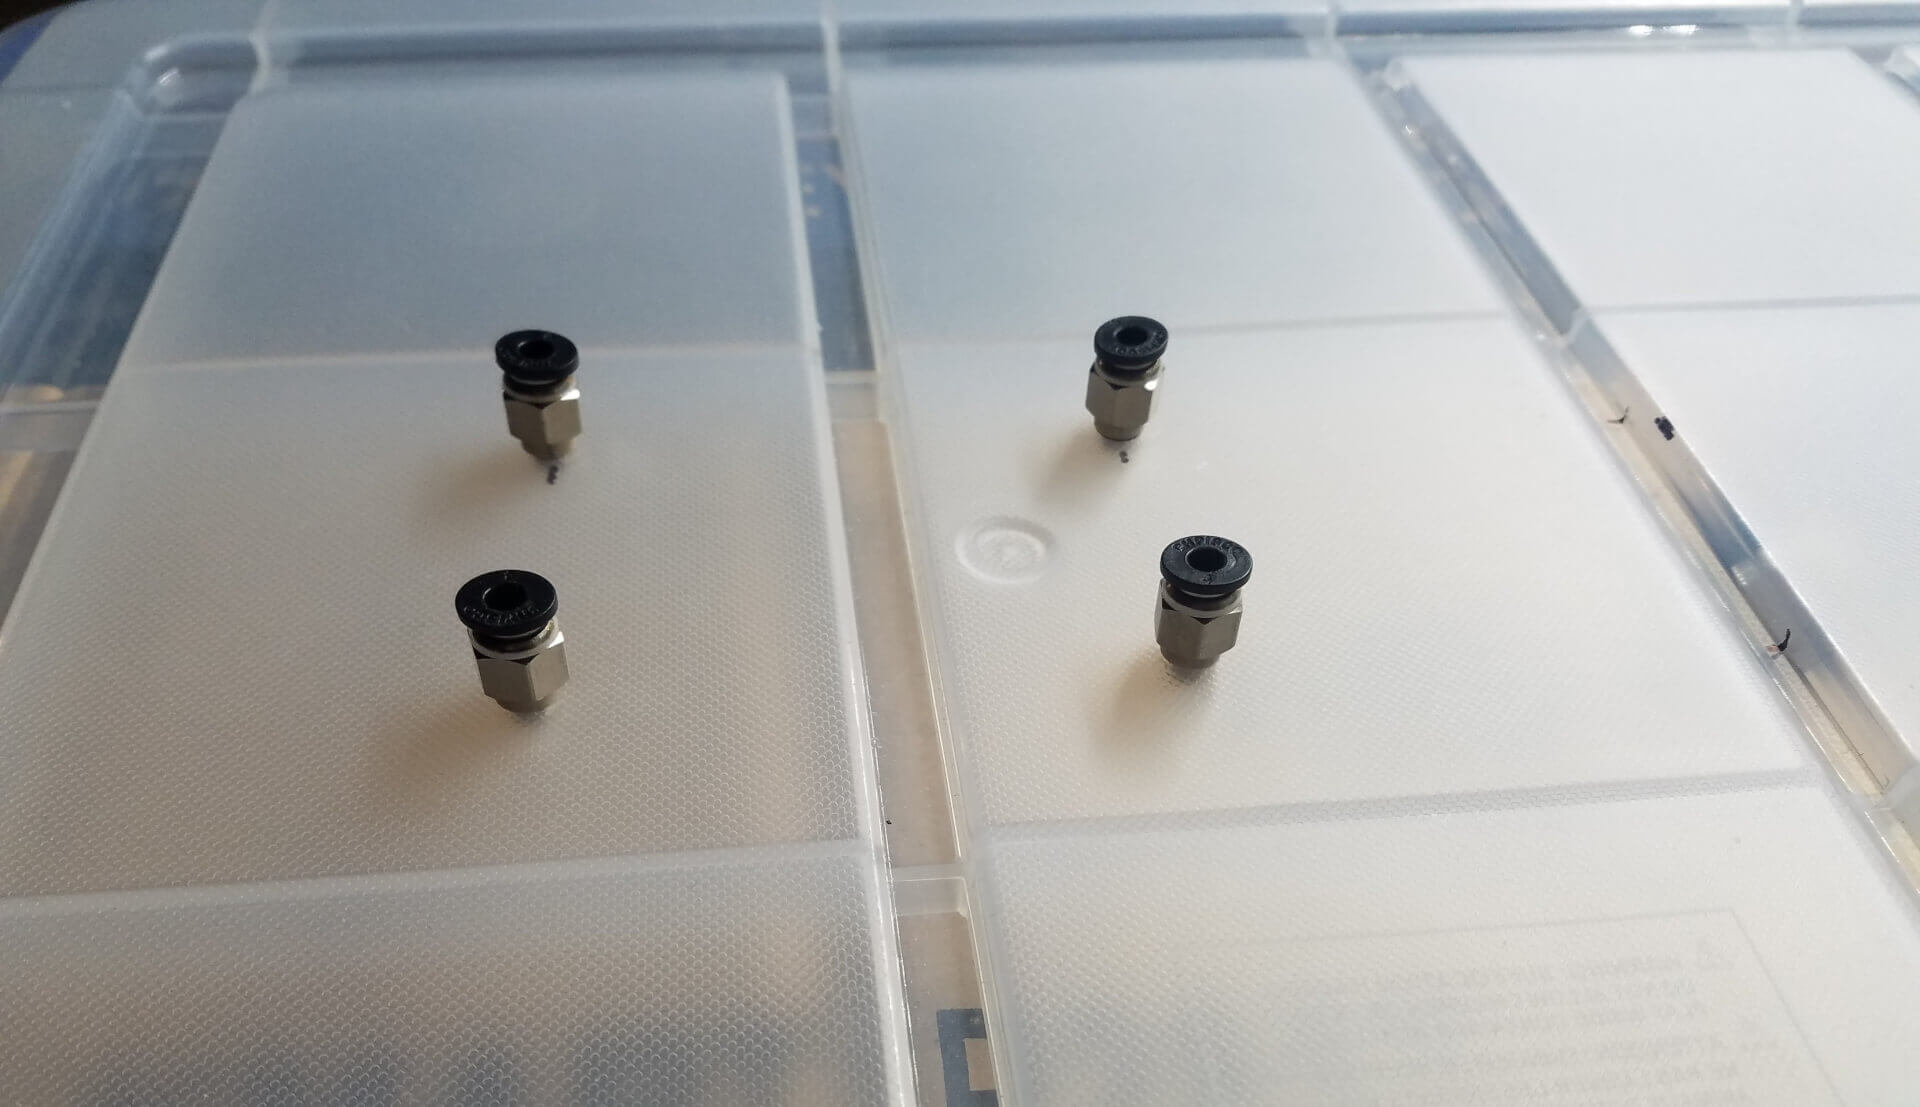
On the underside, use an M5 nut to secure the connectors. The coated nut also helps the filament feed smoothly.
Connecting the two together:
Cut tubing to connect the feed strip and the bin.
Cutting the tube caused some burs that interfered with the filament. Clean up the end with a blade. Slightly widen the end with a round tool (screwdriver, pencil, etc) to help insert the filament.
Connect the two ends.
Supporting your Reels:
Using the design from Thingiverse, print off as many spool rollers as needed. We picked this roller because the two halves are independent, allowing us to use the same rollers for various width spools. Another option is using a rod that goes through the length of the bin, but that would be a nuisance with so many spools. If your bin is only 1 or 2 spools then a rod would be a good choice. I may end up using double sided tape to secure them firmly in place if they move too much.
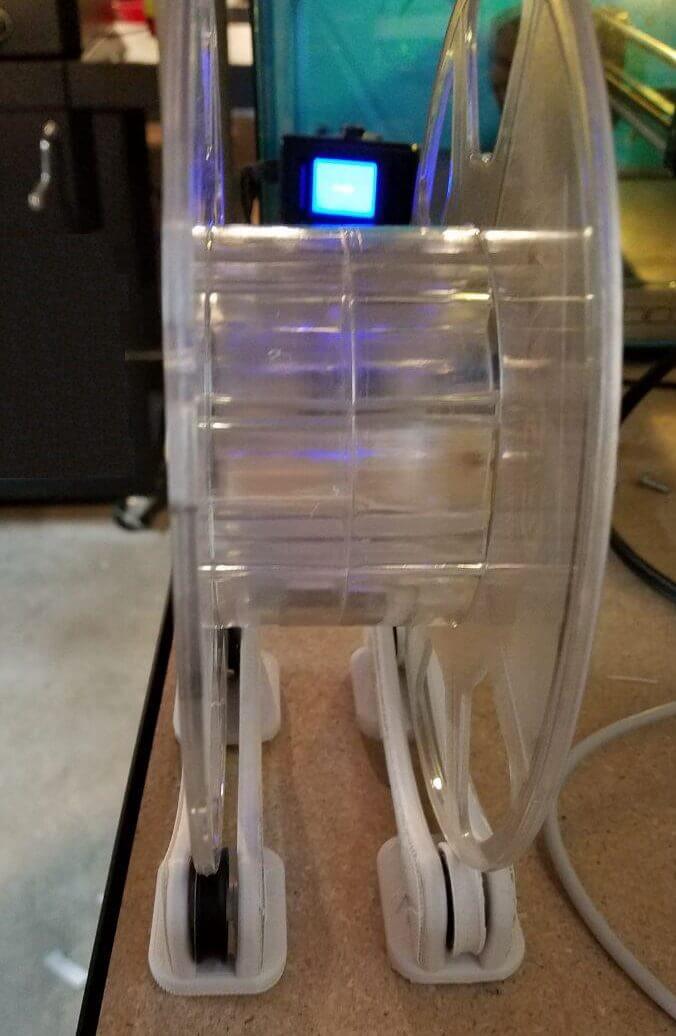
Use a mallet if necessary to fit the bearing into the guide.
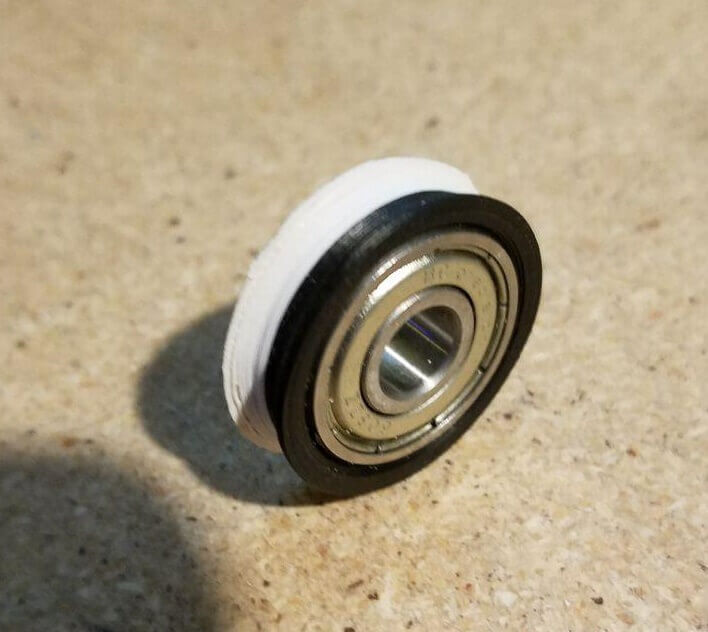
Now that the spools roll freely, push the plastic into the tubing and out the wood strip.
Finishing off:
Adding your Silica Gel Desiccant Packet. I recook mine about every 6 months. Warning! Not all packets are reusable, please read the instructions for your specific packet.
Packet Reactivation:
- Oven for 2.0 hrs at 200°F
- Oven for 0.5 hrs at 250°F
- Microwave for About 10 Minutes at DEFROST.
- Bonus: Free packets located in shoe boxes, and other items. I date them and toss them in there. Just trash these after 6 months.

- Reel Dehydration:
- ABS: 4.0 hrs at 180°F
- ABS: 6.0 hrs at 160°F
- PLA: 6.0 hrs 100°F (your oven may not go this low, you can try a food dehydrator, untested by us. Let us know in the comments)
- PLA: 4.0 hrs 105°F (your oven may not go this low, you can try a food dehydrator, untested by us. Let us know in the comments)
More images: