Theres a few ways on the amlogic chips to recover boxes, but theres also many ways to recover these units. I will talk about which I have used and others. In reality it is really difficult to fully brick one of these units permanently. I will start off with the basics and work my way up to the more advanced methods.
Disclosure: Everything in this document was sourced from somewhere online. If you want original links please ask me if I havent already posted them in one of the Image Source links. This document does NOT contain any proprietary knowledge that wasnt already sourced from the internet.
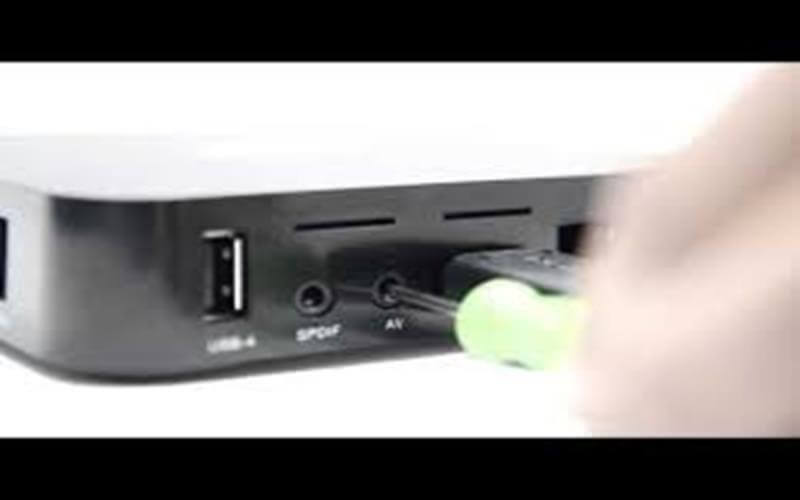
Recover method 1: Reset button
Yes I know, very basic and im sure most of you have tried it. However some may not know that the reset button has dual purpose and is also hidden cleverly behind the “AV” or “IR” port on some of these boxes. Feel free to shove a paperclip carefully to not miss the button and hit a component. Try it first while its unplugged so you can get the hang of it and not short anything out internally live. You have to hold it down for about 3-4 seconds to trigger recovery.
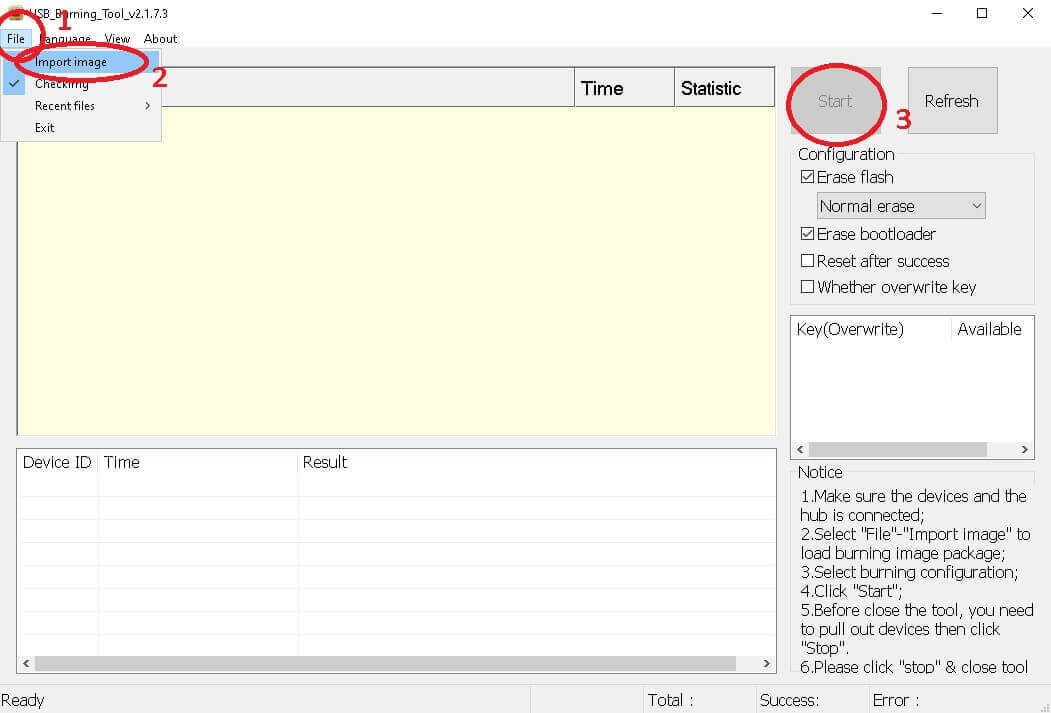
Recover method 2: AMLogic Burn tool
Find a downloadable image for your specific device out in the wild. You can also try banggood.com product pages ussually seem to post download links. Then download the usb burn tool 2.1.7.3
Go to File -> import image, Select your image, Hit Start, and finally plugin your device.
It will pickup automatically. You can also hold the reset button if it does not.
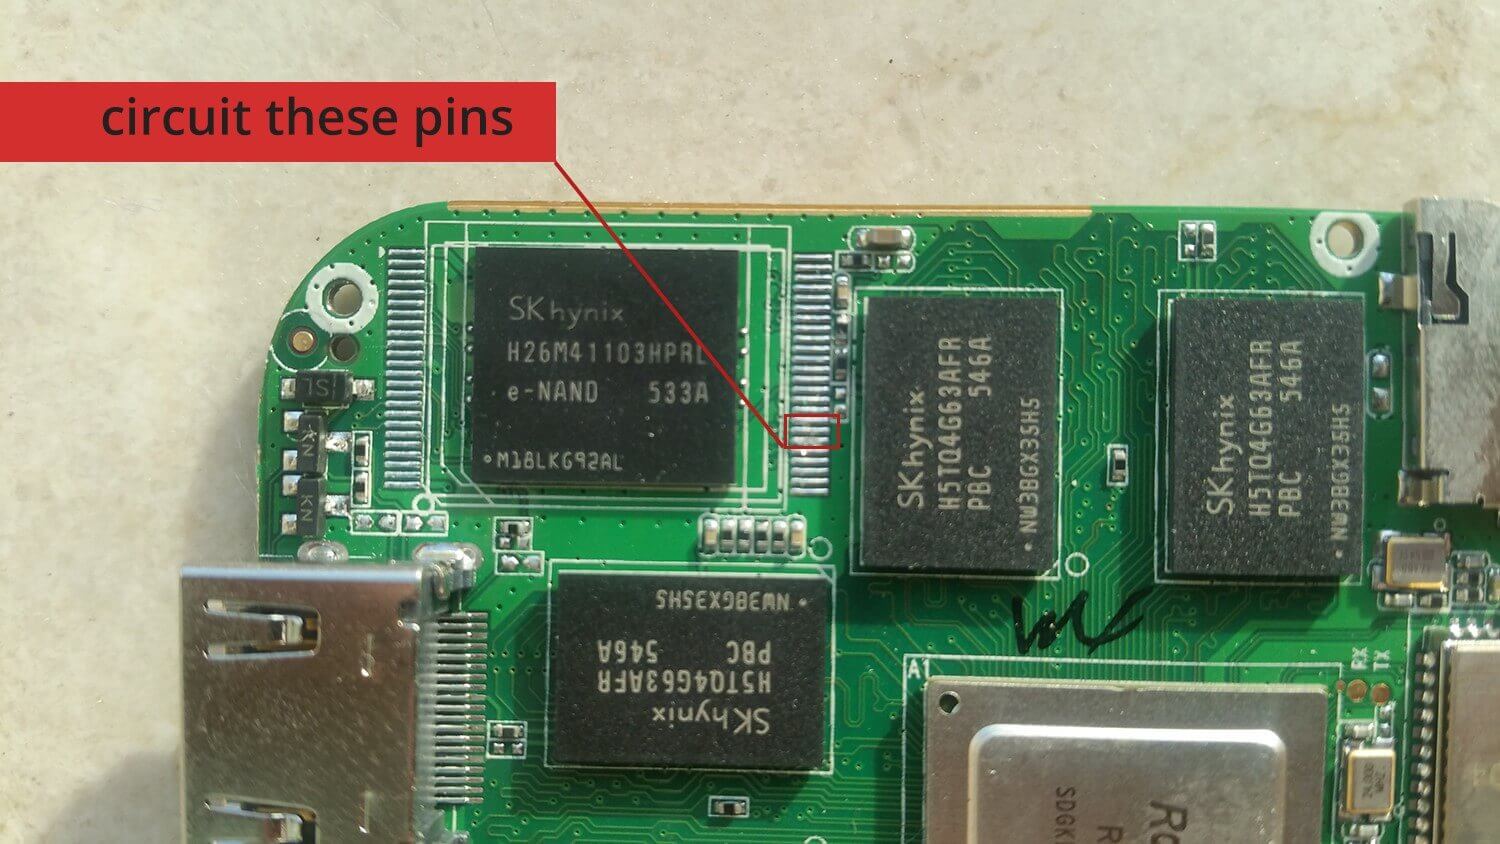
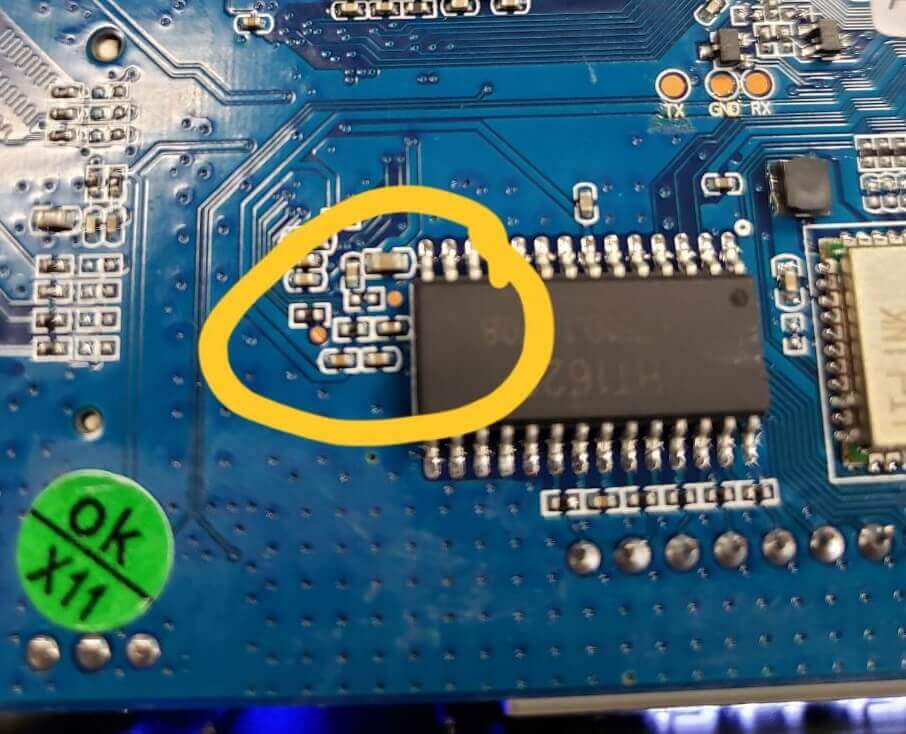
Recover method 3: Short the NAND chip
This is is risky and very diffucult to spot and document as each device is different. Most new devices uses pads for this while older devices have exposed leads on the old memory chips. Shorting the NAND chip’s two pins will throw the device into flash mode on some devices. Take a look at the image below for some examples. This is also called MaskRom mode on many devices including Rockchip devices. You will need to have the USB Burn tool installed and follow the steps from method 2. You can also checkout the source document which contains source images I posted here.
- Open device housing and find the NAND. In some boxes you also need detached heatsink or cooler in order to reach NAND
- Place PCB in front of you so you can clearly read NAND’s name and board number
- You should choose 6-7 or 7-8 pin from NAND bottom on the right side or 6-7 or 7-8 pin from first pin (first pin is marked on PCBA with a triangle) Short circuit it while plugging to Host PC and powering on. Check pins for other devices online first.
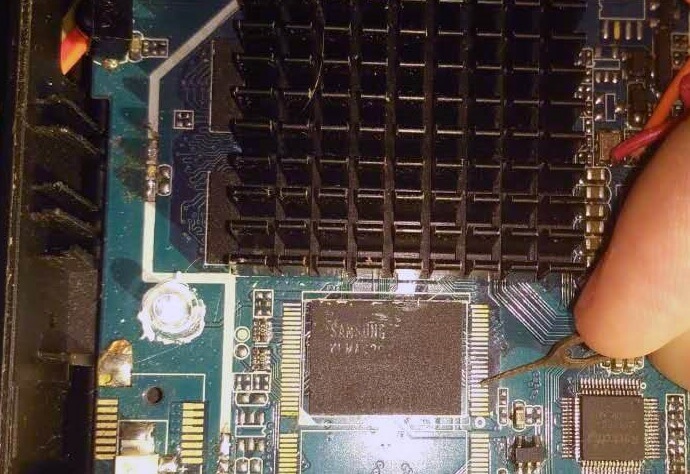
On this device with a newer chip there are pads on the opposite side of the board right under the NAND itself.
Recover method 4: AMLogic SD Burn image
I have not used this method as it shows very little success for my devices. But I am told it works well for others. Using the Burn card maker you can write your image to a micro sd card and following any of the methods above will yield you a proper flash.
Recover method 5: Serial port jtag
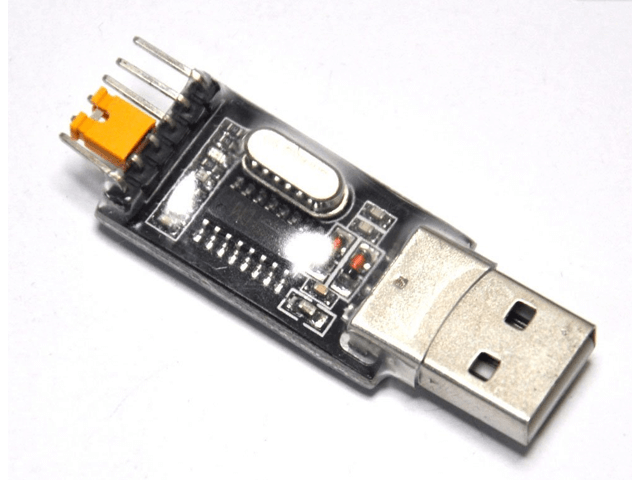
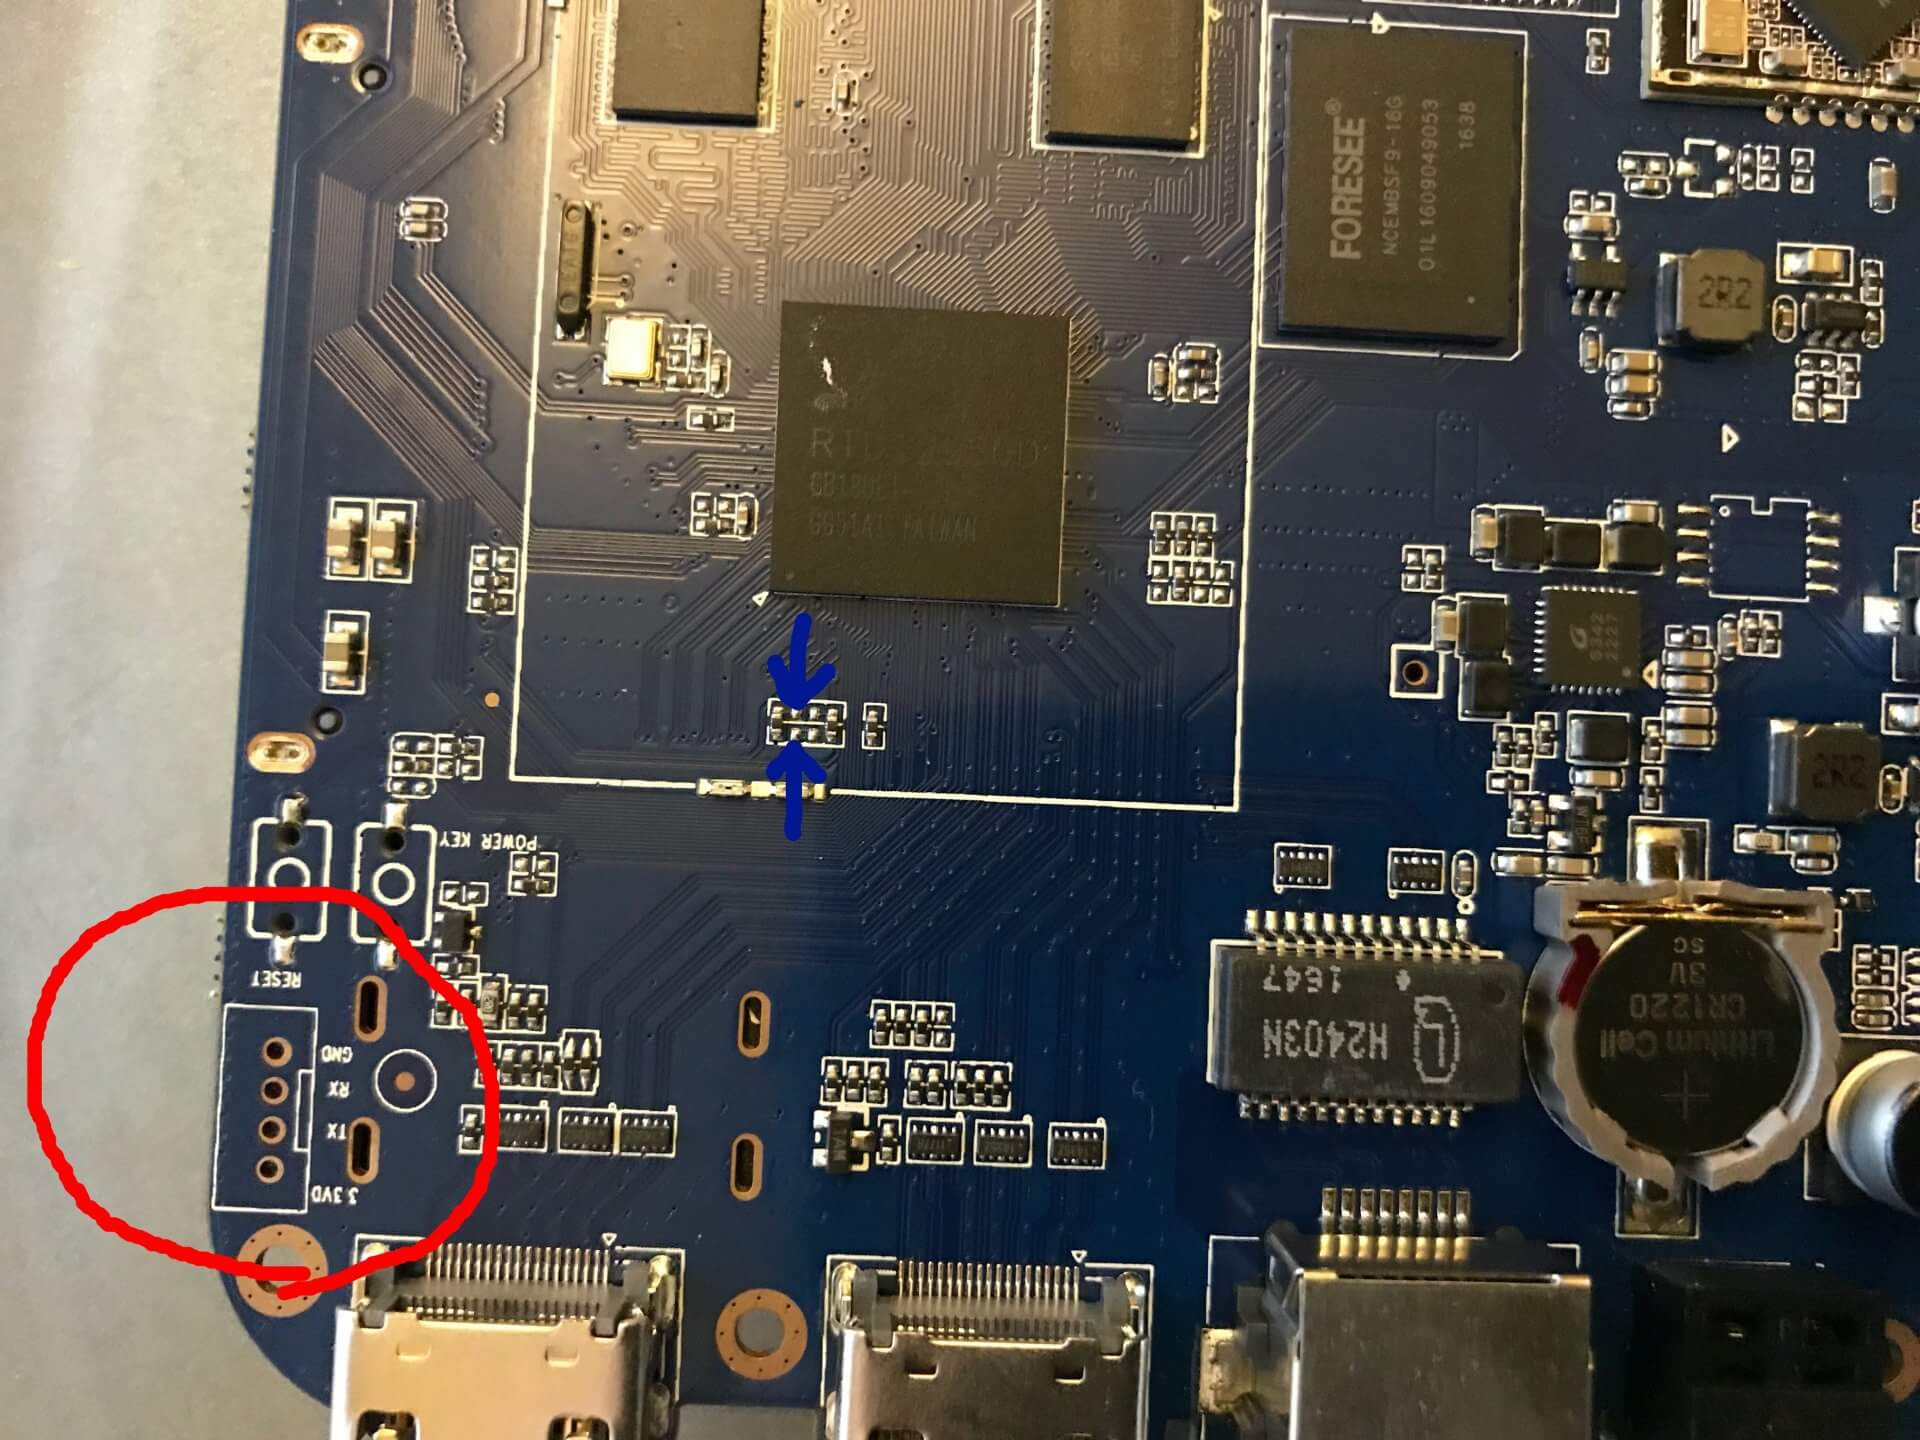
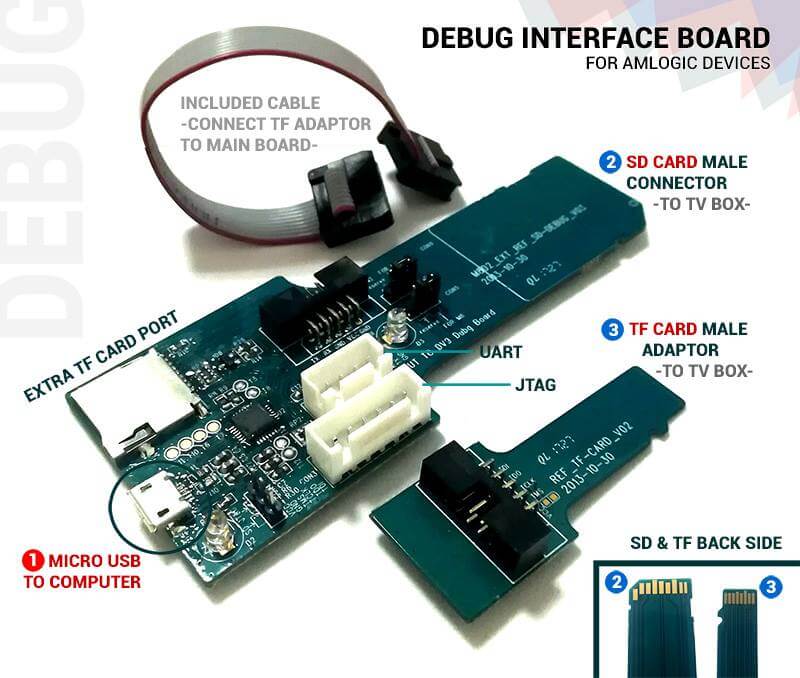
You will need to open your device up for this step and locate any pins or unsoldered holes labeled GND/TX/RX/3.3V or sometimes just labeled UART or even JTAG. These will work with any USB to TTL device such as the CH340 or the CP2102 (more reliable). This is my primary means of recovery for any device now. Its reliable and works 100% of the time on AMLogic devices.
Once located attach the TTL usb device to it, you can also solder some pins permanently if you are recovering this device often for development.
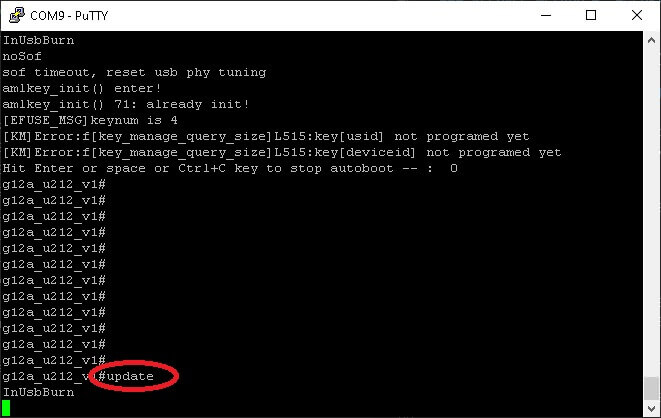
Open Putty using the following settings with your COM number identified in Device manager for Windows.
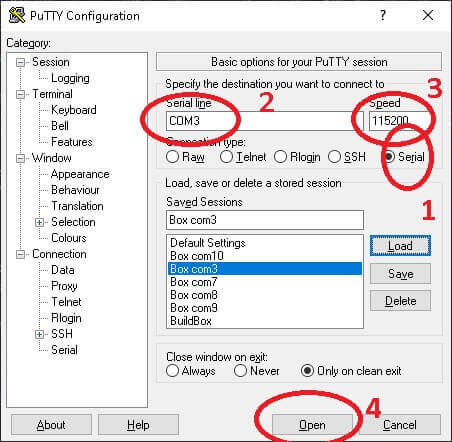
With the putty window open mash the enter key while you plug the power into the device. You will essentially stop boot and enter the boot console. You can now go ahead and type update and use method 2 above to flash.
Recover method 6: Micro SD card serial Console
Similar to method 5, However I do not own the device in question to post any good images about it. I am told its the same and works withouth opening the box.
You can see the device here on this facebook post selling it.
I have not been able to locate one to buy it myself. If you would like to sell me one reach out to me in the comments below.
Know of any other recovery methods?. Let me know below in the comments.